


Papaya is packed with nutrients, minerals and vitamins, making it wholesome for every age group. Eating papaya regularly enables healthy bodily functions, it also improves digestion. But that’s not all, papaya also has many skin benefiting properties. This is why papaya extract is added to a number of skincare products like scrubs and masks. In fact, papaya facials are one of the most popular facials in salons. Almost every salon offers this type of facial under their fruit facial category due to its superior exfoliating and skin brightening ability.
Whether you are someone who prefers doing facials at home or are trying to save some money, you can easily include this fruit in your facial for healthy and glowing skin. Don’t know how to do it? We will show you a detailed step-by-step method to do a papaya facial at home. But before that, let’s take a look at all the benefits of using papaya on your skin. This simple and inexpensive method is sure to give you the skin of your dreams as it tackles almost every skin problem, right from dullness to premature ageing. Let’s take a look at all the benefits of papaya.
- 1. Benefits of papaya for the skin
- 2. How to do a papaya facial at home
- Step 1: Papaya and milk cleanser
- Step 2: Papaya and rice flour scrub
- Step 3: Steam
- Step 4: Papaya and aloe massage cream
- Step 5: Papaya and honey mask
1. Benefits of papaya for the skin

Fruits are great for your skin, including them in your diet or applying them topically on the face can offer great results. Rubbing a slice or applying mashed papaya on the face can address many skin concerns and lead to healthy and glowing skin. Here’s what papaya can do for your skin.
i) Reduces wrinkles
Signs of ageing have started appearing sooner and sooner in women. Antioxidants are essential to tackle this issue. Papaya is rich in the antioxidant lycopene that fights wrinkles and fine lines. It also has the ability to improve skin elasticity, thereby making it look smooth and supple.
ii) Controls acne
The enzymes papain and chymopapain found in papaya are known to reduce inflammation of the skin. This reduces inflammation and redness of active acne. What’s more, it also has mild exfoliating properties that remove dead skin cells, which may clog pores if left on the skin. Papaya also contains flavonoids, which means it is an excellent antibacterial and antifungal ingredient that keeps acne causing bacteria at bay.
iii) Removes dead skin cells
Physical exfoliators can be pretty harsh, especially for those with sensitive skin. Applying ripe, mashed papaya on the face can gently remove dead skin cells. This mild exfoliator removes dirt and other impurities from the skin, leaving you with smooth, radiant and younger-looking skin.
iv) Soothes irritated skin
The healing enzymes in papaya make it an excellent fruit for soothing irritated skin. It also offers relief from sunburn. Simply rubbing the insides of a papaya peel on sunburnt or irritated skin can offer quick relief.
v) Improves skin tone
Dark spots and blemishes are common skin concerns. They can be corrected by using the goodness of papaya. The fruit is often used as a home remedy to treat dark spots and blemishes by mixing it with honey.
2. How to do a papaya facial at home

Now that you are aware of all the benefits of papaya for your skin, we bet you want to know how to reap its benefits, right? Apart from applying it as a mask from time to time, you can also give yourself a papaya facial at home by mixing the fruit with other natural ingredients. Here’s how you can do it.
Step 1: Papaya and milk cleanser

The first step of any facial procedure is cleansing to get rid of dirt and oil from the face. The lactic acid in milk mildly exfoliates the skin to remove dirt and oil that clog the pores. Using this cleanser on a regular basis can help get rid of acne, whiteheads, blackheads, etc. To prepare your own papaya cleanser at home follow the instructions below.
You will need:
- 1 tablespoon of mashed papaya
- 2 tablespoon of milk
How to: In a clean bowl, add the mashed papaya and milk and mix well. Apply all over the face using your fingers and massage well for about 1-2 minutes to thoroughly cleanse the skin. Wash with lukewarm water to finish your first step of the papaya facial.
Step 2: Papaya and rice flour scrub

The next step as you know is exfoliating. This helps remove deep-set dirt, opens pores to extract impurities sitting inside and leaves you with smooth skin. It also improves blood circulation, thereby making your skin glow. Rice flour is gentle, yet an amazing exfoliating ingredient, which means this scrub can even be used by those with sensitive skin.
You will need:
- 1 tablespoon of mashed papaya
- 1 tablespoon of rice flour
How to: Mix papaya and rice flour in a bowl to form a thick paste. If needed, add more papaya to the mixture. Use the paste to massage your face and neck area. Be gentle and continue for a few minutes, then wash it off.
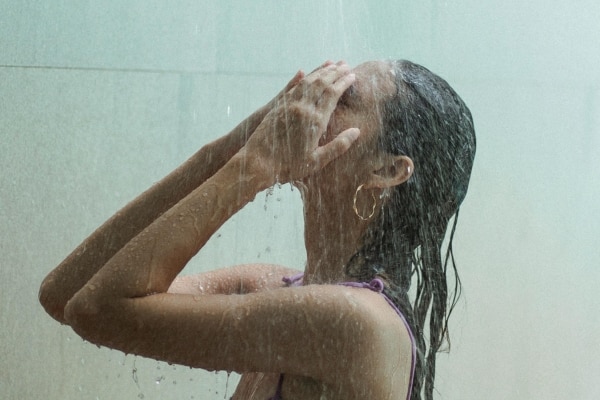
Step 3: Steam

Now that your pores have been cleansed deeply, it’s time to open them up using steam. This step also relaxes your skin and body and takes the dull and tired look off your face.
You will need:
- A bowl of steaming hot water
How to: Bend over the bowl so that the steam from the water touches your face, and make sure you don’t go too close. Cover your head with a cloth to prevent the heat from escaping. Alternatively, you can dip a towel in hot water, wring out the excess water and place it on your face for a few minutes. This ends the third step of your all-natural papaya facial.
Step 4: Papaya and aloe massage cream

The next step of your papaya facial is massaging. This step ensures the ingredients from the cream reach deep into the skin as the pores are open. It also improves blood circulation and closes the pores so that external dirt and impurities don’t enter them. Aloe vera has superior soothing and healing properties, and massaging it with papaya on the face will hydrate the skin as well as work on problems like pigmentation, sunburn and premature ageing.
You will need:
- 1 tablespoon of mashed papaya
- 1 tablespoon of aloe vera gel
How to: Put the mashed papaya paste into the bowl, then add fresh aloe vera gel by scraping it off the leaf. Combine the two ingredients to form a cream-like consistency. Use it to massage your face and neck area. Massage in upward motions with mild pressure for about 10 minutes, then wipe it off using a soft cotton napkin.
Step 5: Papaya and honey mask

The final step of this papaya facial is a mask. Masking further relaxes your skin, nourishes it and imparts a healthy glow, making it an important step. Honey has soothing and moisture-retaining properties that keep your skin supple and glowing. Lemon works as an astringent to close the pores and form a protective layer.
You will need:
- 2 tablespoons of mashed papaya
- 1 teaspoon of a honey Half teaspoon of lemon juice
How to: Add all the ingredients in a bowl and mix well. With the help of a brush or clean fingers, apply the mask evenly all over your face and neck area and relax. Allow it to dry for about 10-15 minutes before washing with water. Pat dry and notice how soft, glowing and clear your skin looks.
That’s how you do a papaya facial! Do it twice a month for the skin of your dreams. After the facial, make sure you don’t step out in the sun immediately. Wear a broad-spectrum sunscreen and use gentle skincare products to care for your skin.


 Privacy Notice
Written by Sanya Hamdani on 21st Dec 2020
Sanya Hamdani is a skincare enthusiast and lipstick hoarder, she truly believes no two red lipsticks look exactly alike. With a Master's degree in Communication & Journalism and 5+ years of digital writing experience up her sleeve, Sanya has some of the biggest beauty experts in the country on her speed dial. When she's not swatching products or writing about the latest trends in beauty, you will find her watching F.R.I.E.N.D.S. or cooking up a storm in the kitchen.